Bluehost is perfect for you if you're just starting out and especially if you're not planning on hosting your own online course platform. Running your online course with a WordPress LMS plugin may require more extensive plans than what Bluehost offers.
A potential migration to a higher end host when you start having more enrollments is almost certain. It is considered a budget web hosting plan, but you can run a WordPress site on it, just not one with advanced LMS plugins.
Skill Level:
Since Bluehost targets the lower end of the hosting world as far as pricing goes, they know a big portion of their clients are just starting out. Therefore, they do make their dashboard easy to use even for beginners. You don't need any special skills to set-up your website with this hosting provider.
Deployment:
You'll access your Bluehost account by logging into the dashboard online. From there, you can install WordPress with just one-click or upload your website files through FTP if you're using another site builder.
Special Features:
Bluehost provides 24/7 support along with in-depth tutorials to help get you started. Their Basic plan is one of the cheapest hosting plans available online and is a fantastic way to start an online business.

Bluehost Step by Step Tutorial with Screenshots: How to Set It All Up
Step 1:
Go to Bluehost website.

This is an obvious step, you can click on the link above and go to Bluehost homepage. Setting it all up might seem overwhelming, but once you look at the screenshots below, you’ll see that Bluehost isn’t.
Step 2:
Select which plan do you want. Realistically speaking the Basic plan is only for a CV type page, not a blog.

Step 3:
Register your domain, or buy a new domain. A domain is the URL of your blog. Think about it for a while, because you can’t change it later. All Bluehost plans include a free domain, so there’s no need to buy it elsewhere.

Now, enter your contact information and extra you’d like to purchase. While you can get the extras later, I HIGHLY recommend Site Backup Pro. You don’t want to lose all your work.


Step 4:
Now, you’ll be transferred to the part no one likes: payment. Just remember that Bluehost charges you for the full 36-month agreement, upfront, similar to most hosts.

Bluehost will find recommendations on more domains available for you with a different extension. You don’t need to purchase these, but if you’re worried that another blogger will create a similar name you might spend a few extra bucks.
Step 5:
A system will ask you to select a password that you’ll be using to log in to your website.


Step 6:
This step is optional as you can either select a theme that Bluehost offer, or install your own. You can also skip this option and deal with it later.

Step 7:
Here you can choose to either:
Start Building your website on WordPress
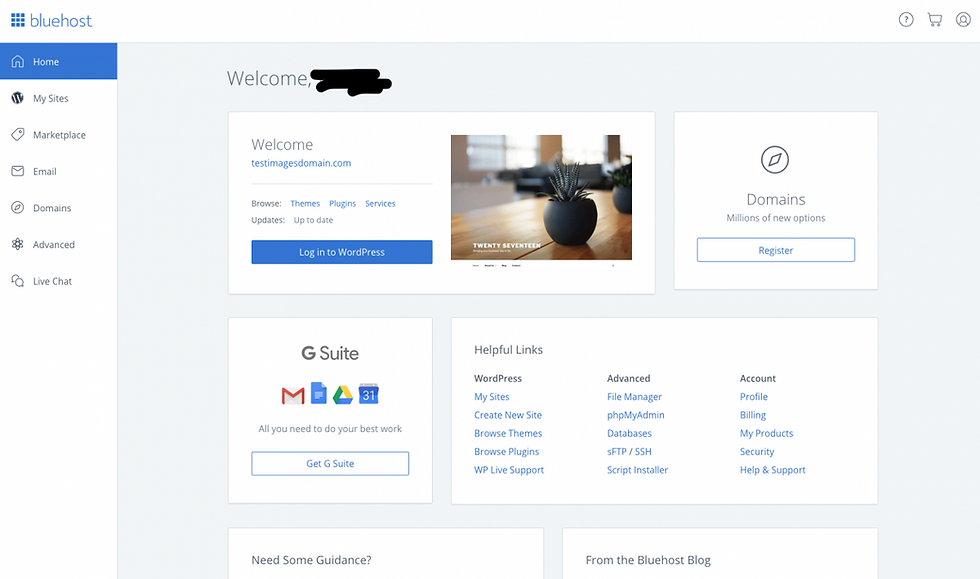
Go to your Bluehost account (cpanel)
If you pick the first option, your WordPress dashboard will look like the screenshot below.

Step 8:
You’re almost set. You can choose to launch your site or display a ‘Coming Soon’ page and launch whenever you’re ready.

Step 9:
Once you’re ready to launch you’ll see this:

Watch this video for better understanding.

Comments