GoHighlevel is a new-age marketing tool that attempts to consolidate the most useful marketing tools under a single umbrella.
What are triggers in GoHighLevel? Triggers are conditional statements (similar to Zaps in Zapier) that connect all the different modules of HighLevel together.
Think of triggers as the wiring or 'secret sauce' in the back-end making all the cool things HighLevel does actually happen.
or
Example:
Let's say you have set up a Zap in Zapier to push leads into a HighLevel campaign when they fill out a form embedded in a ClickFunnels landing page. You also want to send an SMS notification to your client to let them know when this happens (the equivalent to letting them know they have a new lead).
How would we do this?
Answer: Set up a trigger!
Create, Name and Activate Triggers
Follow the steps below to create, name and activate a trigger:
Click Triggers
Click + New Basic Rule
Choose a trigger from the Choose a trigger dropdown and add all the necessary filters
Click +Add action
Choose an action from the Choose a action dropdown and all the necessary filters
Name the Trigger in the Trigger name field
Click the Draft dropdown and click Activate
or
Appointment Triggers
Understanding the difference between the two appointment triggers and when to use one vs the other.
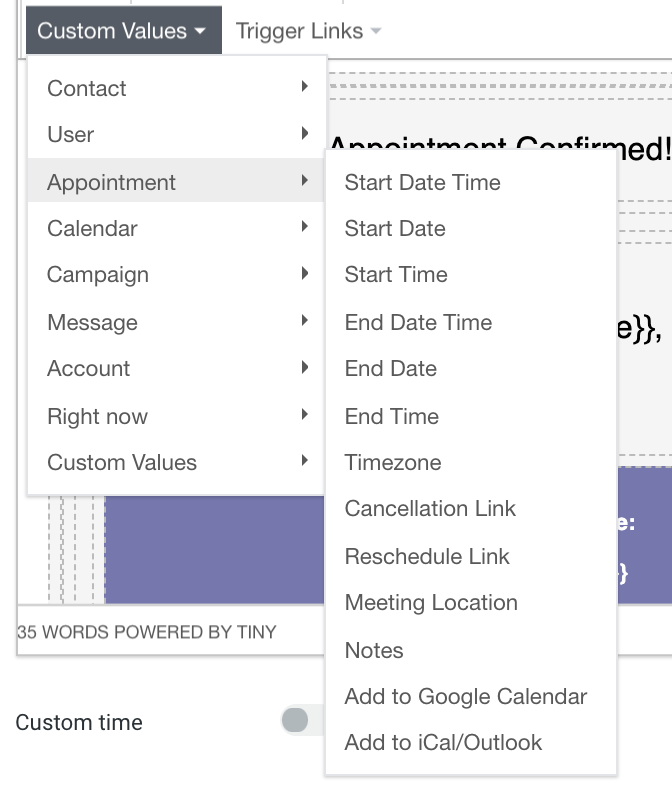
When {{appointment.start_time}} or any other appointment custom values are not showing:
or
Upgrade to Highlevel SAAS Pro plan. Click here We will need the Appointment or Customer booked appointment trigger in order for the {{appointment.start_time}} or any other appointments custom values to show up.
If you use the Pipeline stage changed as the trigger, HL won't know which appointment it is.
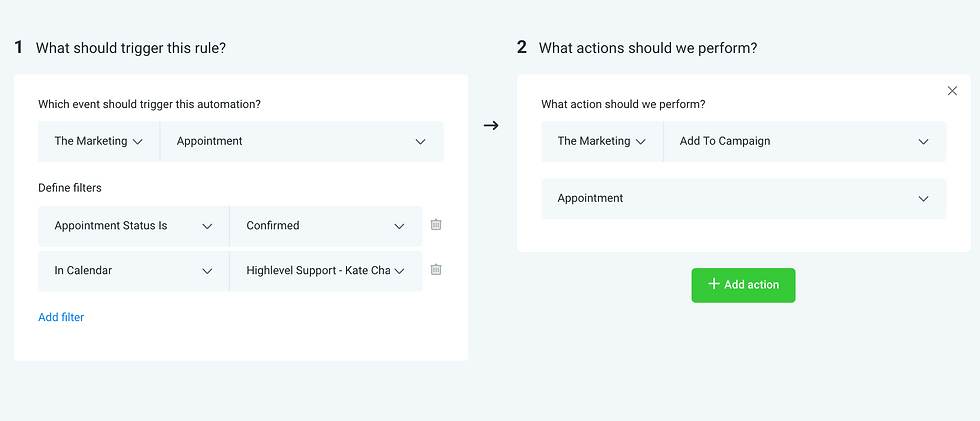
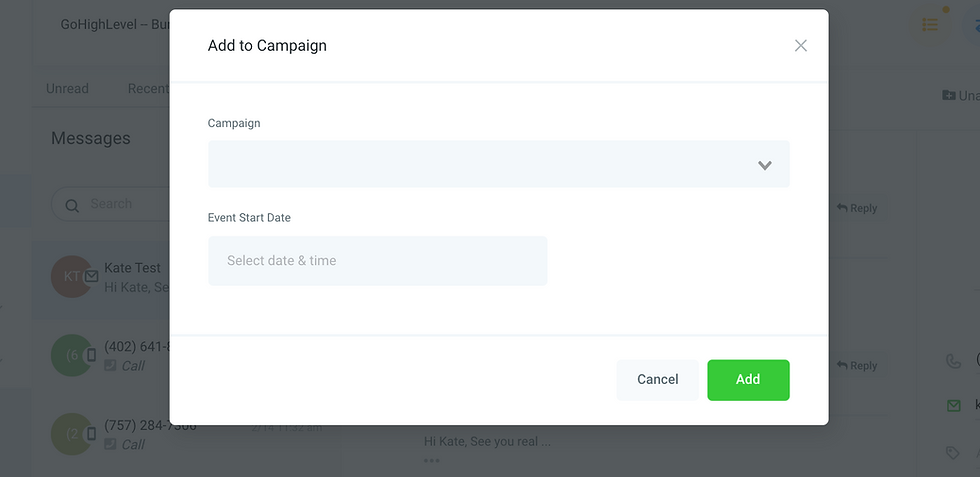
If you need to manually add the lead to the Appointment Reminder Campaign, you will need to select the appointment start time as the event start date.
or
To reschedule manually, you could go to the Appointments tab on the right and switch Confirmed to Reschedule. This will automate the process of removing the leads out of the original appointment reminder campaign and re-adding them to the appointment reminder campaign again with the new appointment time.
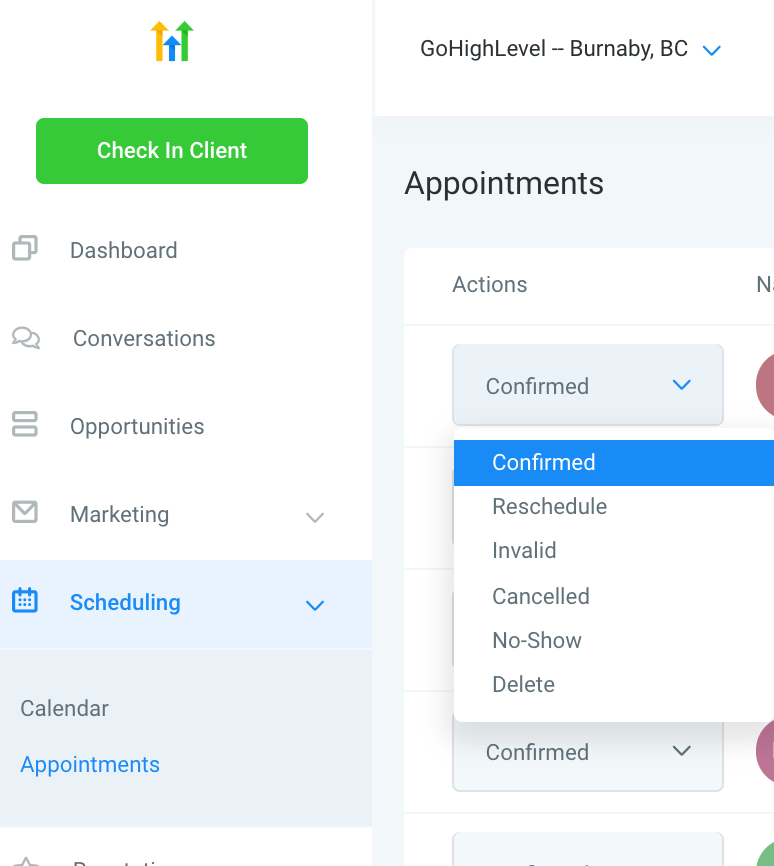
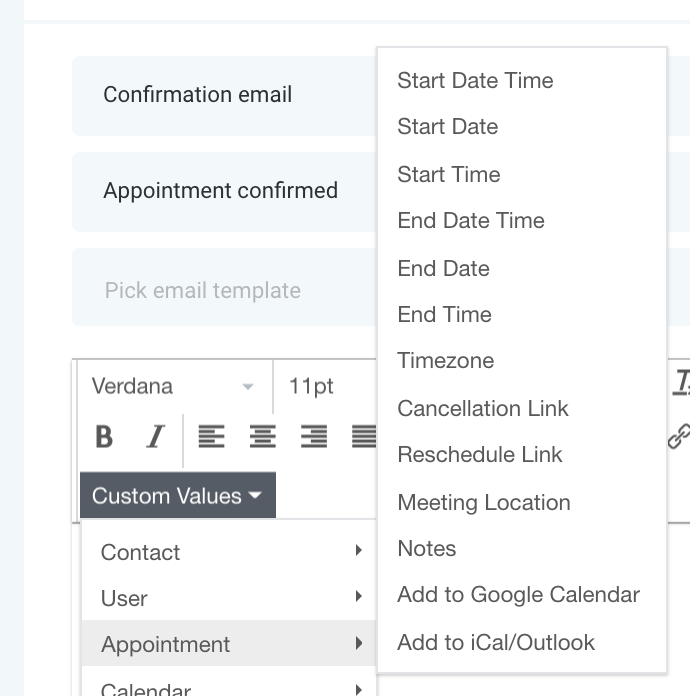
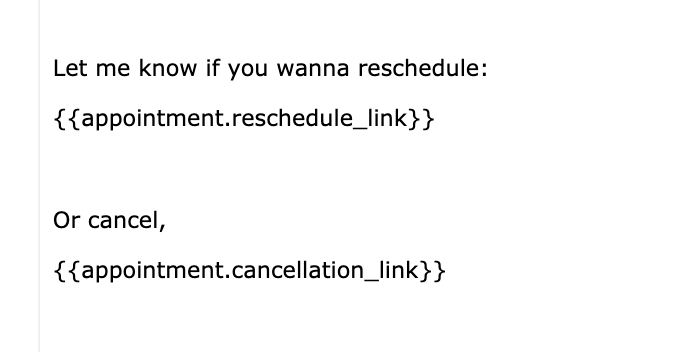
If you want your leads to be able to reschedule themselves, you could choose the reschedule link from the Custom Values in the appointment reminder campaign:
or

댓글